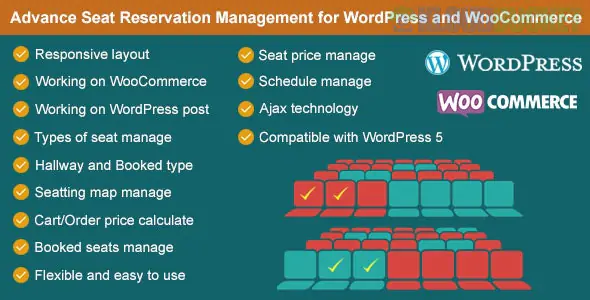
Advance Seat Reservation Management for WooCommerce is a specialized solution designed for businesses that sell "seat-based" products rather than just generic appointments. It is ideal for theaters, cinemas, event venues, buses, and sports arenas where customers need to see a physical layout and choose their specific location.
This plugin transforms a standard WooCommerce product page into an interactive seating chart.
Interactive Seat Map: A visual drag-and-drop editor allows you to recreate your venue's layout (rows, columns, hallways, and stages).
Seat Categories & Tiered Pricing: Define different types of seats (e.g., VIP, Standard, Handicap) and assign unique prices to each.
Real-Time Availability: Prevents double-bookings by instantly marking seats as "Pending" when someone adds them to their cart.
Cart Timer: You can set a time limit (e.g., 15 minutes) for how long a seat is reserved in a cart before it's released back to the public.
QR Code Integration: Most versions of this plugin automatically generate a unique QR code for each seat purchased, which can be sent in the "Order Completed" email for easy check-in.
There are a few similarly named plugins. Depending on your specific needs (cinema vs. bus vs. general events), you may prefer one of these:
Feature
Advance Seat Reservation (smartcms)
Stachethemes Seat Planner
Cinema Seat Reservation
Best For
General events, buses, trains
Theaters & high-end arenas
Cinemas & movie theaters
Editor Type
Profile-based (Rows/Cols)
Visual Drag-and-Drop
Grid-based
Price Model
Lifetime (One-time)
Subscription or Lifetime
Freemium (Lite version)
Unique Perk
Excellent for transport logic
Extremely modern UI/UX
Simple setup for movie screens
Once you have installed your chosen plugin, follow these general steps:
Create a Seating Profile: Navigate to the plugin settings and create a "Profile" (e.g., "Main Hall"). Define your rows, columns, and seat labels.
Define Seat Types: Set up your categories (VIP, Economy). Assign colors to each so customers can distinguish them easily on the front end.
Link to a Product: Create a new WooCommerce product (e.g., "Concert Ticket"). In the Product Data box, look for a "Seat Reservation" tab.
Select the Map: Choose the profile you created in Step 1. You can often override prices here specifically for this event.
Configure Checkout: Enable options like "Auto-complete order" if you want QR codes sent immediately upon successful payment.
If a customer's payment fails or their session expires, sometimes a seat can stay "locked" in the database. Look for a "Cleanup Settings" or "Integrity Checker" in the plugin dashboard to ensure these seats are automatically released every few minutes.
Would you like me to help you compare the pricing and specific "transport" features of these plugins if you are building a site for a bus or airline service?
Subscribe to access unlimited downloads of themes, videos, graphics, plugins, and more premium assets for your creative needs.
.jpg) Help Us to Buy More New Theme/Plugin
Help Us to Buy More New Theme/Plugin
Published:
Jan 21, 2026 11:36 AM
Version:
v3.1
Category:
Author:
OtherLicense:
GPL v2 or Later